Cozy No-Bake Oreo Cheesecake Cups
On those warm summer evenings when the sun sets behind the trees, casting a golden glow over everything, I can’t help but think back to family gatherings filled with laughter, love, and of course, dessert. It was a tradition in my house — after a hearty meal, we would dig into something sweet, usually a creamy cheesecake or a chocolate delight. Let me take you back to those simpler times with these delightful No-Bake Oreo Cheesecake Cups!
Each spoonful of these indulgent treats reminds me of sharing stories around the table, where every bite is rich and velvety, just like our fond memories. Not only are they satisfying for the sweet tooth, but they also bring that comforting feeling of nostalgia that we all crave. Trust me; this is one you’ll definitely want to pin for later!
Why You’ll Love This Recipe
- No Baking Required: These creamy cups come together without turning on an oven, making them perfect for warm days or last-minute cravings.
- Crowd-Pleasing Treat: Whether it’s a family picnic or a party with friends, these cheesecake cups are bound to impress.
- Easily Customizable: You can add your favorite toppings or flavors to make each cup unique.
- Quick and Simple: With just a few easy steps, you can whip up a delicious dessert in no time.
- Kid-Friendly Fun: Great for little helpers to join in the kitchen fun — they’ll love crushing Oreos and decorating tops with mini cookies!
- Perfect Summer Dessert: Light, creamy, and absolutely decadent, these No-Bake Oreo Cheesecake Cups are refreshing for summer gatherings.
Ingredients You’ll Need for No-Bake Oreo Cheesecake Cups
- 18 Oreo cookies
- 3 tbsp melted butter
- 8 oz cream cheese (softened)
- 1/2 cup powdered sugar
- 1 tsp vanilla extract
- 1 1/2 cups whipped topping
- Mini Oreos for garnish
How to Make No-Bake Oreo Cheesecake Cups
Start by crushing the Oreo cookies into fine crumbs. You can place them in a zip-top bag and use a rolling pin or pulse them in a food processor for a coarser texture. Mix the crushed Oreos with the melted butter until well combined, then press this mixture into the bottom of your serving cups to form a firm crust.
In a medium mixing bowl, beat the softened cream cheese, powdered sugar, and vanilla extract together until the mixture is smooth and fluffy. The aroma will instantly transport you to a cozy kitchen filled with warmth.
Gently fold in the cool whipped topping, ensuring to keep that lovely lightness in your mixture. This is what makes the cheesecake filling so airy and creamy — just divine!
Layer the cheesecake filling over the Oreo crust in each cup. For a chocolatey surprise, feel free to add Oreo chunks into the filling before layering or on top!
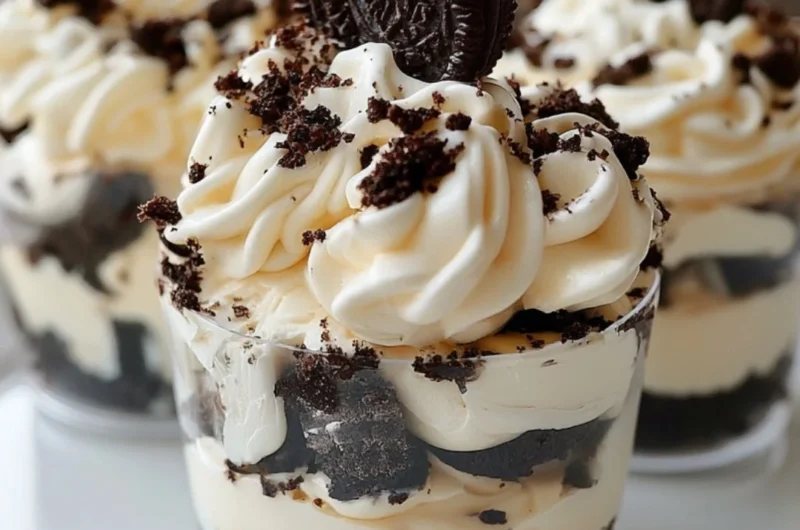
Top each cup with a dollop of whipped topping, a sprinkle of crushed Oreos, and finish with a cute Mini Oreo for garnish. They’re just so adorable!
Chill your beautiful creations in the refrigerator for at least 1 hour before serving. Patience is key here as it allows everything to set perfectly, creating that luscious cheesecake experience.
Delicious Variations to Try
- Mint Chocolate: Fold in a bit of mint extract into the cheesecake mixture for a refreshing twist, perfect for mint lovers.
- Peanut Butter Bliss: Swirl in some creamy peanut butter to the filling for a nutty, indulgent flavor combo.
- Fruit Infusion: Add fresh fruit like strawberries or raspberries on top for a zesty, vibrant finish. The tartness balances the rich flavors beautifully!
- Mocha Oreo Cups: Mix a bit of instant coffee into the combination for a delightful caffeine kick — coffee and chocolate were meant to be together!
Chef Emma’s Helpful Tips
- Make-Ahead Magic: These cups can be made a day ahead of time! They actually taste better after resting, as the flavors meld beautifully.
- Ingredient Swaps: You can use reduced-fat cream cheese and whipped topping for a lighter version without sacrificing flavor.
- Storage Suggestions: Store any leftovers in an airtight container in the refrigerator for up to 3 days, but beware — they might disappear faster than you think!
- Perfect Layers: To achieve those stunning layers, use a piping bag to add the cheesecake filling, or spoon it carefully to avoid mixing the layers too much.
What’s Inside – Nutrition Breakdown
Serving Size: 1 cup
Calories: 220
Carbohydrates: 26g
Sugar: 16g
Fat: 10g
Protein: 3g
Sodium: 150mg
Frequently Asked Questions
Can I make this ahead?
Absolutely! In fact, they often taste even better after sitting in the fridge for a day.
Can I use different ingredients?
Yes! You can swap out the cream cheese for a lower-fat version or even use dairy-free cream cheese for a vegan-friendly option.
How do I store leftovers?
Store any leftovers in an airtight container in the refrigerator for up to 3 days. Just make sure to layer them carefully!
How long does it last?
These delightful treats will stay fresh for about 3 days in the fridge, but I doubt they’ll last that long!
A Cozy Closing Note
These No-Bake Oreo Cheesecake Cups embody the warmth of memories shared with loved ones, making every bite feel like a hug. Perfect for summer gatherings, cozy family nights, or simply treating yourself to something delicious, these cups promise to bring a smile to your face. Save this No-Bake Oreo Cheesecake Cups to your dessert board so it’s ready when you need a cozy treat! Happy cooking, dear friends!
Print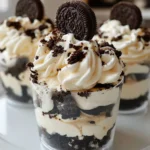
Cozy No-Bake Oreo Cheesecake Cups
- Total Time: 75 minutes
- Yield: 6 servings 1x
- Diet: Vegetarian
Description
Delicious and creamy no-bake Oreo cheesecake cups, perfect for summer gatherings and family picnics.
Ingredients
- 18 Oreo cookies
- 3 tbsp melted butter
- 8 oz cream cheese (softened)
- 1/2 cup powdered sugar
- 1 tsp vanilla extract
- 1 1/2 cups whipped topping
- Mini Oreos for garnish
Instructions
- Start by crushing the Oreo cookies into fine crumbs. You can place them in a zip-top bag and use a rolling pin or pulse them in a food processor for a coarser texture.
- Mix the crushed Oreos with the melted butter until well combined, then press this mixture into the bottom of your serving cups to form a firm crust.
- In a medium mixing bowl, beat the softened cream cheese, powdered sugar, and vanilla extract together until the mixture is smooth and fluffy.
- Gently fold in the cool whipped topping, ensuring to keep that lovely lightness in your mixture.
- Layer the cheesecake filling over the Oreo crust in each cup.
- Top each cup with a dollop of whipped topping, a sprinkle of crushed Oreos, and finish with a cute Mini Oreo for garnish.
- Chill your beautiful creations in the refrigerator for at least 60 minutes before serving.
Notes
These no-bake cups can be made a day ahead of time for even better flavor. They can also be customized with various toppings and flavor infusions.
- Prep Time: 15 minutes
- Cook Time: 0 minutes
- Category: Dessert
- Method: No-Baking
- Cuisine: American
Nutrition
- Serving Size: 1 cup
- Calories: 220
- Sugar: 16g
- Sodium: 150mg
- Fat: 10g
- Saturated Fat: 5g
- Unsaturated Fat: 3g
- Trans Fat: 0g
- Carbohydrates: 26g
- Fiber: 1g
- Protein: 3g
- Cholesterol: 20mg