
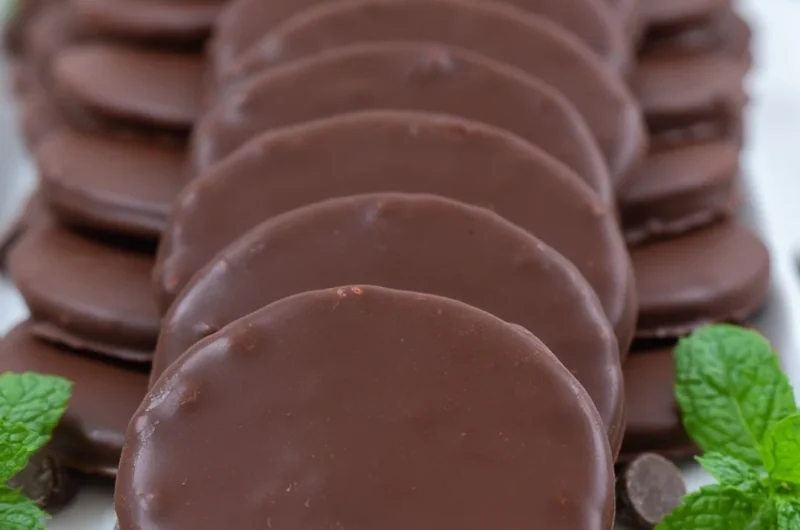
Homemade Thin Mints Girl Scouts Cookies: A Cozy Delight
There’s something irresistibly nostalgic about biting into a crisp, minty cookie that instantly transports you back to childhood. Whether you were a Girl Scout munching on them after a long day of sales or simply a fan of those iconic green boxes, Thin Mints have a special place in our hearts. Today, I’m inviting you to relive those cozy moments with my homemade version of Thin Mints—perfect for any time you crave that sweet refreshment! These delightful treats are not just easy to make, but they also bring the comforting aromas of baking and chocolate into your home, making every corner feel toasty and inviting. This is one you’ll definitely want to pin for later!
Why You’ll Love This Recipe
- Quick & Easy: These cookies come together in no time, making them perfect for busy weeknights or last-minute gatherings.
- Family-Friendly: Kids will love helping out, whether it’s rolling the dough or dipping the cookies in chocolate!
- Nostalgic Flavor: Experience the joy of classic Thin Mints any time of year with this simple at-home recipe.
- Customizable: Feel free to explore different flavors or toppings, keeping your treats exciting and new.
- Perfect for Sharing: These cookies are a hit at parties, potlucks, or as a sweet gift for neighbors and friends.
What You’ll Need
Gathering simple ingredients is half the fun! Here’s what you need to make these delicious Homemade Thin Mints:
- 1 cup unsalted butter, softened
- 1 cup granulated sugar
- 2 cups all-purpose flour
- 1/2 cup unsweetened cocoa powder
- 1 tsp peppermint extract
- 1/2 tsp baking powder
- 1/4 tsp salt
- 1 cup semi-sweet chocolate chips
- 1 tbsp coconut oil (optional, for thinning chocolate)
Let’s dive into the cozy process of making these iconic cookies!
Step-by-Step Instructions
Let’s make it together! Follow these simple steps to whip up your own batch of homemade Thin Mints:
- In a large bowl, cream together the butter and sugar until light and fluffy, allowing the sweetness to develop.
- Mix in the flour, cocoa powder, baking powder, salt, and peppermint extract until combined, creating a rich and fragrant dough.
- Roll the dough into a log and wrap in plastic wrap; refrigerate for at least 1 hour. This resting time helps the flavors meld and the dough firm up for easier slicing.
- Preheat the oven to 350°F (175°C). The smell of preheating will begin to fill your kitchen with warmth!
- Slice the chilled dough into thin rounds and place on a baking sheet lined with parchment paper. They don’t have to be perfect; that homemade charm is part of the fun.
- Bake for 10-12 minutes, then cool completely—your kitchen will smell like a chocolate lover’s paradise.
- In a microwave-safe bowl, melt the chocolate chips with coconut oil until smooth. The coconut oil helps the chocolate glide over the cookies effortlessly.
- Dip each cookie into the melted chocolate, ensuring they’re fully coated for that indulgent finish.
- Place on parchment paper to set, and enjoy your homemade Thin Mints! Share with family and friends or keep them all for yourself—the choice is yours!
Delicious Variations to Try
Feeling adventurous? Here are some fun ways to customize your Homemade Thin Mints to thrill your taste buds:
- Dark Chocolate Delight: Use dark chocolate chips instead of semi-sweet for a richer, more sophisticated flavor.
- Zesty Orange: Add a hint of orange zest to the dough for a bright, citrus twist that complements the mint wonderfully.
- Crispy Mint Chip: Fold in some crushed peppermint candies or mint chocolate chips into the dough for an extra minty pop!
- Minty Coconut: Mix in shredded unsweetened coconut for a tropical flair that adds texture and flavor.
Chef Emma’s Helpful Tips
To ensure you get the best results with these homemade treats, here are some of my kitchen secrets:
- Make-Ahead Advice: These cookies can be made ahead of time and stored in an airtight container, keeping the minty goodness fresh for days.
- Chilling is Key: If the dough feels sticky, don’t hesitate to chill it for longer; a firm dough makes slicing much easier.
- Slicing Tricks: Use a sharp knife to slice the log into rounds for clean edges. Wipe the knife with a damp cloth between slices to prevent sticking.
- Storage Suggestions: Store your adorable Thin Mints in a cool, dry place. You can also freeze them for up to three months, bringing a taste of comfort anytime!
Nutrition Information per Serving
As with all treats, moderation is key! Here’s a closer look at the nutrition in these delectable cookies:
- Serving Size: 2 cookies
- Calories: Approximately 180
- Carbohydrates: 24g
- Sugar: 12g
- Fat: 8g
- Protein: 2g
- Sodium: 70mg
Frequently Asked Questions
Got questions? I have answers! Here are some common queries regarding these scrumptious cookies:
- Can I make this ahead? Yes! These cookies can be made in advance and stored in an airtight container.
- Can I use different ingredients? Absolutely! Feel free to substitute with gluten-free flour or dairy-free chocolate chips.
- How do I store leftovers? Store them in a cool, dry place in an airtight container or freeze them for future enjoyment.
- How long does it last? These cookies are best enjoyed within two weeks if stored properly.
Wrapping It Up
There you have it—your very own batch of homemade Thin Mints that will fill your home with delightful aromas and fond memories. Perfect for a cozy afternoon or sharing at gatherings, this recipe brings the sweetness of childhood back to life. So why wait? Save this Homemade Thin Mints Girl Scouts Cookies recipe to your Pinterest board so it’s ready when you need a cozy treat! Happy baking!